Thursday, March 3, 2011
How to convert HD video for your portable video player
More and more video sharing sites have gone Hi-Def. YouTube launched its user-generated HD channel in last December. Recent good news is that BBC iPlayer introduced HD program in this July. Amazon and CBS also go with the flow in the industry to stream HD videos on the web.
HD video has higher resolution than SD (standard-definition) video, and most commonly involves display resolutions of 1280×720 pixels (720p) or 1920×1080 pixels (1080i/1080p), which is richer, clearer, and more vivid than SD video. As we know, PS3, Xbox 360 and Apple TV are the most popular HD multimedia devices on the market. You may have downloaded HD videos from video sharing sites and now wish to watch them on the go. Well, check out the tips below.
Required attention: 3 to 5 minutes for the initial setup, time varies for conversion based on the length of each video.
Before you start, you'll need to gather these elements:
HD Video Converter from Aneesoft (Windows only, free to try, US$27.95 to buy )
HD video files, almost any size, shape, or formats
A video-capable portable player
Follow these simple steps:
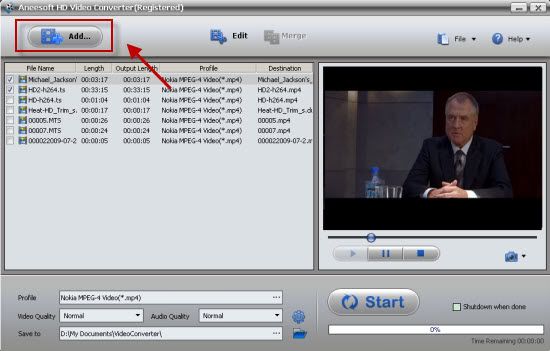
Step 1: Open the HD video you wish to convert using the HD Video Converter
Run the program and click Add... button to select HD videos. The HD Video Converter software supports most of the popular HD video formats including HD AVI, AVCHD M2TS, MTS, HD MOV, HD WMV, HD MP4, HD FLV and more.
Step 2: Crop, trim or add special effects to the HD video
This step is optional. But when you come to review the HD video your taken, how often do you find it's too dark, or the focus is blurred? Now you can fix these flaws and apply artistic effects with the Edit Video module of the program. Plus, with just a few clicks, you can crop the HD video to remove black sides and trim the video easily as below.

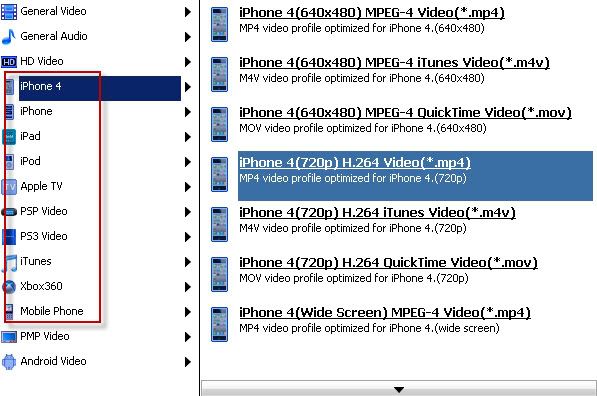
Step 3: Choose your preferred preset
After you finish video source setup, you can select an output format for each video file and specify a directory on your computer to save the output files. In the left-hand section of the HD video converter interface, select the right preset for your device in the drop-down menu. With the personalized profile provided in Aneesoft HD Video Converter, you can easily select the format according to the device name, even if you don't know what formats your device supports.
The default setting works well. Of course, if you don't want to use the default video and audio encoding settings, just click the Settings button to customize these settings.
Step 4: Start Conversion in the HD Video Converter
Click Start and step away from the computer (processor performance will be seriously affected during conversion). See how easy it is!?
Tips & Tricks
Tips 1: With batch conversion supported, you can append many tasks at one time and Aneesoft HD Video Converter will convert them one by one for saving your time.
Tips 2:You can preview the video by selecting the video and clicking Play in the preview pane. You can also take snapshot and save them as jpg, bmp file while preview.
Tips 3: Join multiple video files into one by clicking "Merge" in Source Setup section.You need select the files first in the source list.
Tips 4: To put the converted video to your iPod or iPhone, you must have iTunes 6.0 or later installed on your computer. For the latest versions of these applications, open System Preferences, click Software Update, and then click Check Now.
You may be interested in these topics:
How to convert YouTube to iPad
How to convert AVI to WMV videos
How to convert MP4 to AVI videos
How to convert MKV to XviD videos
How to convert MKV to MPEG videos
How to convert DVD to iPad video format
How to convert DVD to iPhone video format
How to rip DVD to BlackBerry video format
How to convert DVD to MOV video format
How to convert DVD to PS3 video format
How to convert DVD to WMV video format
How to rip DVD to PSP video format
How to convert HD video for your portable video player
How to convert video to iTunes format for free
No comments:
Post a Comment